Part 3 of the Series: Windows 11 on Your Root Server: RDP, Tailscale & VPN for a Free Internet
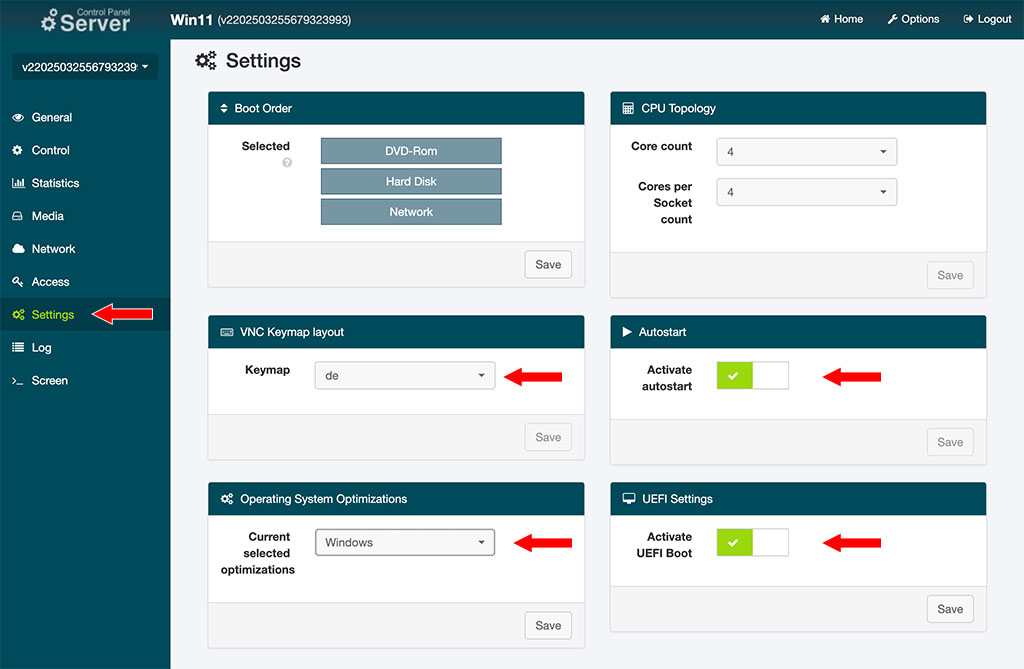
In the Server Control Panel, configure the server hardware under Settings:
Select your preferred keyboard layout, enable autostart and UEFI mode, and set the operating system optimization to Windows.
Next, activate the Windows ISO you created in the previous step as the boot medium. Go to Media→DVD Drive→Custom ISOs and select the appropriate options. Make sure to enable DVD boot mode and confirm by clicking Save.
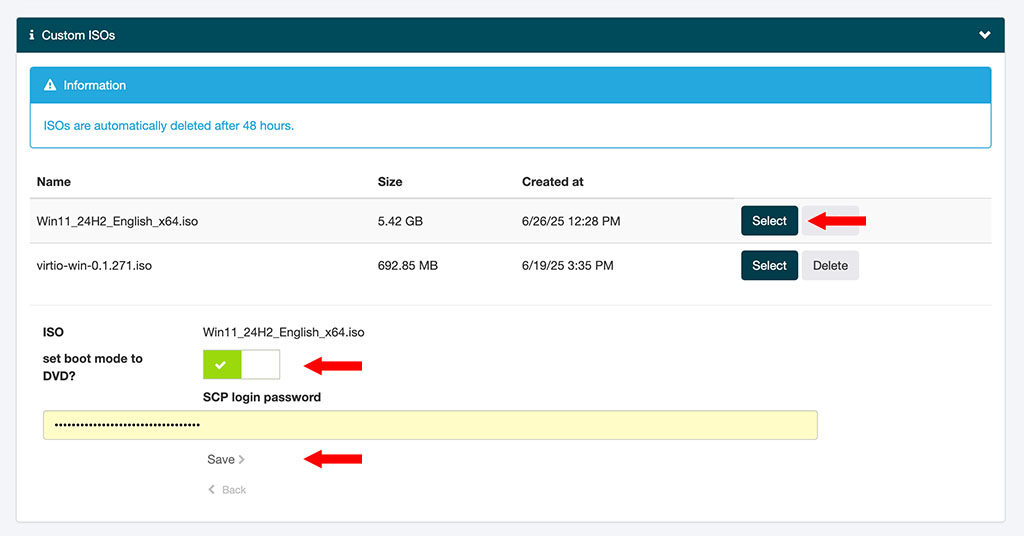
Then click on Control→Powercycle in the Control Panel – the server will restart and boot from the installation DVD.
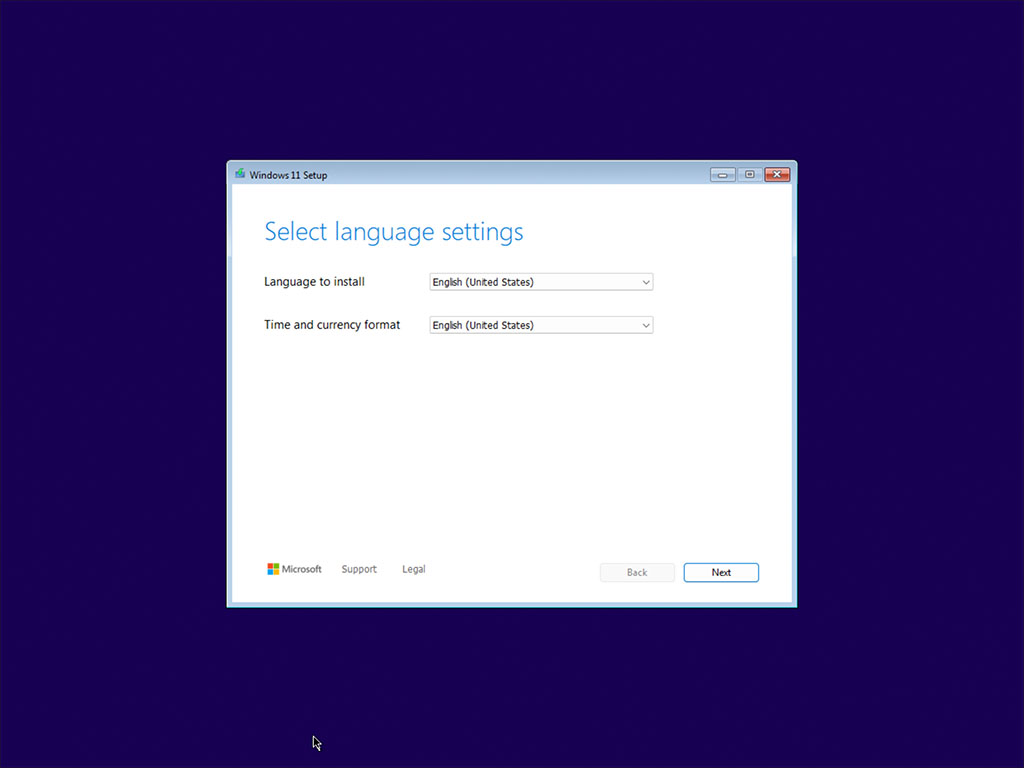
Now open the Remote Console via >_ Screen (on the left-hand side) to view the server’s screen.
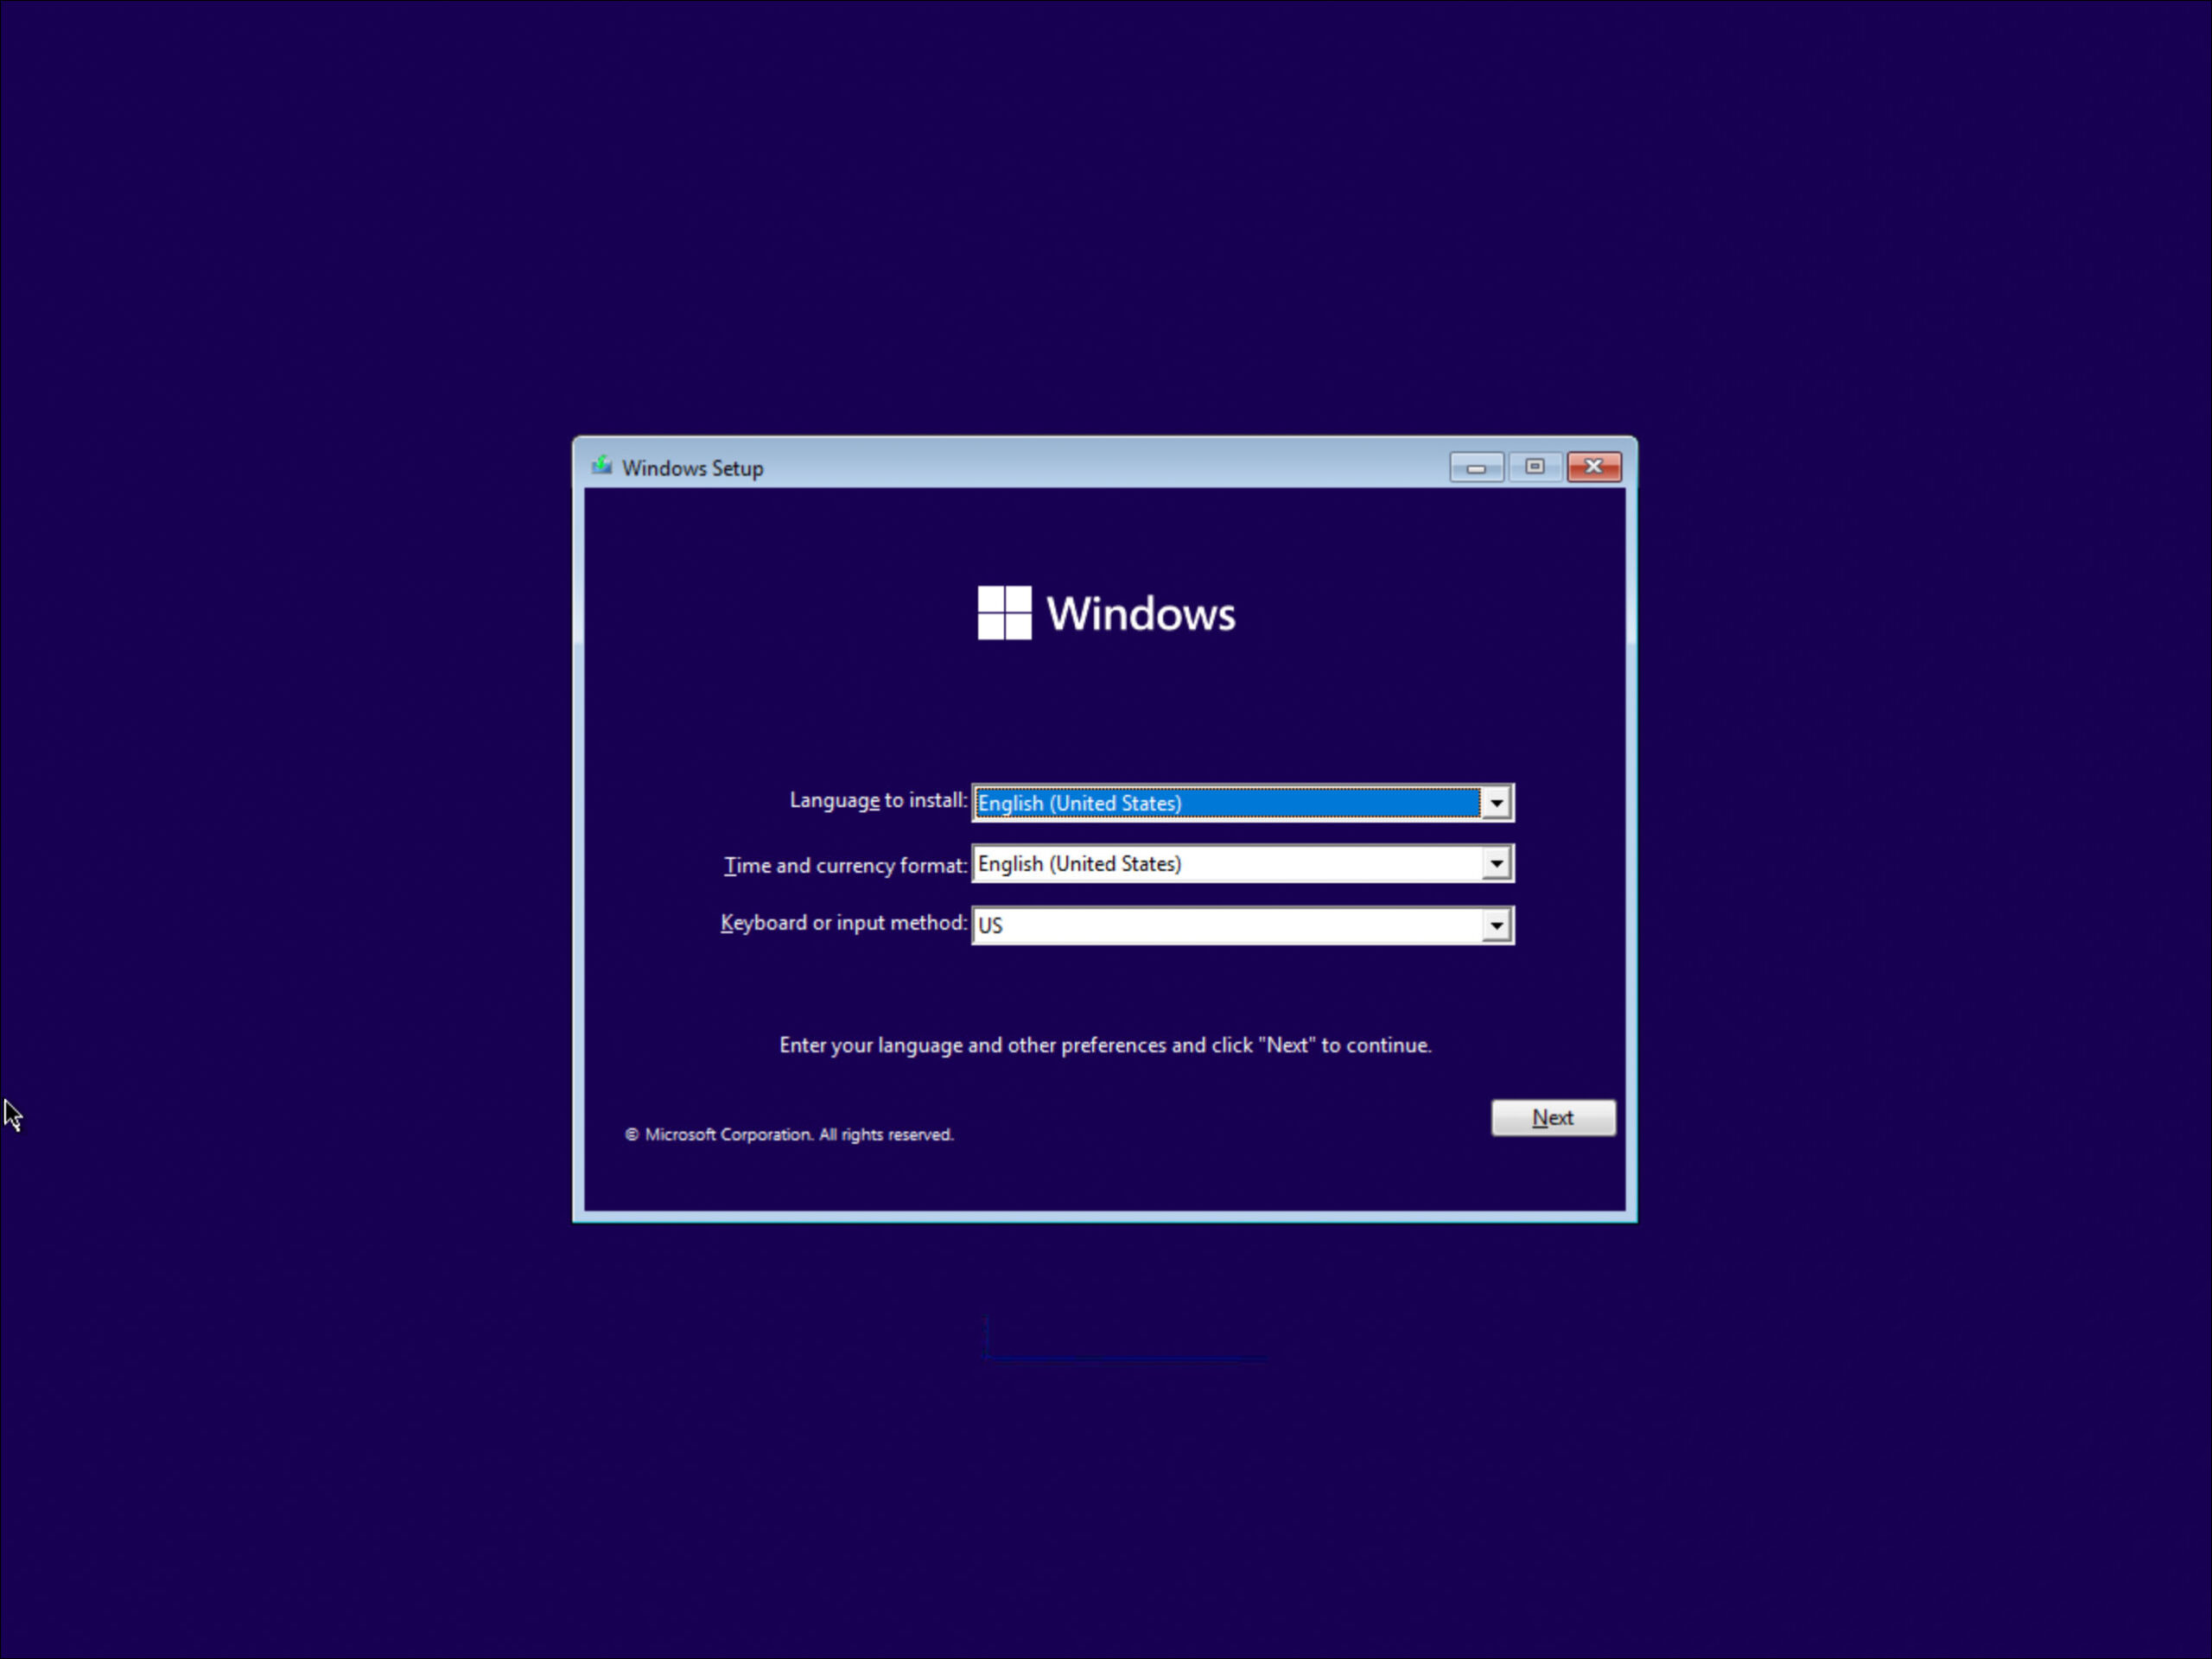
The Windows installation begins: First, you choose the language.
In the next step, select your preferred keyboard layout. Then you’ll be prompted for the setup options – here, choose Previous version of setup.
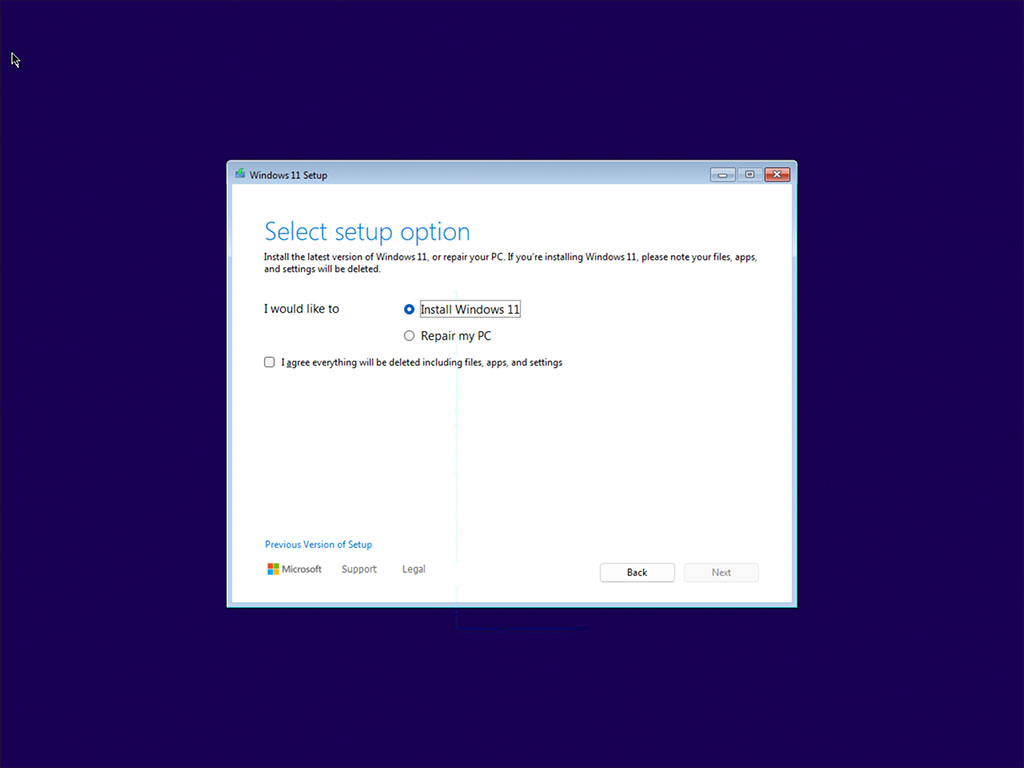
The Windows setup dialog will now appear. Simply click Next to continue.
In the next dialog, you’ll see Install now – but before proceeding, select Show keyboard at the top and press the key combination Shift + F10 on the on-screen keyboard.
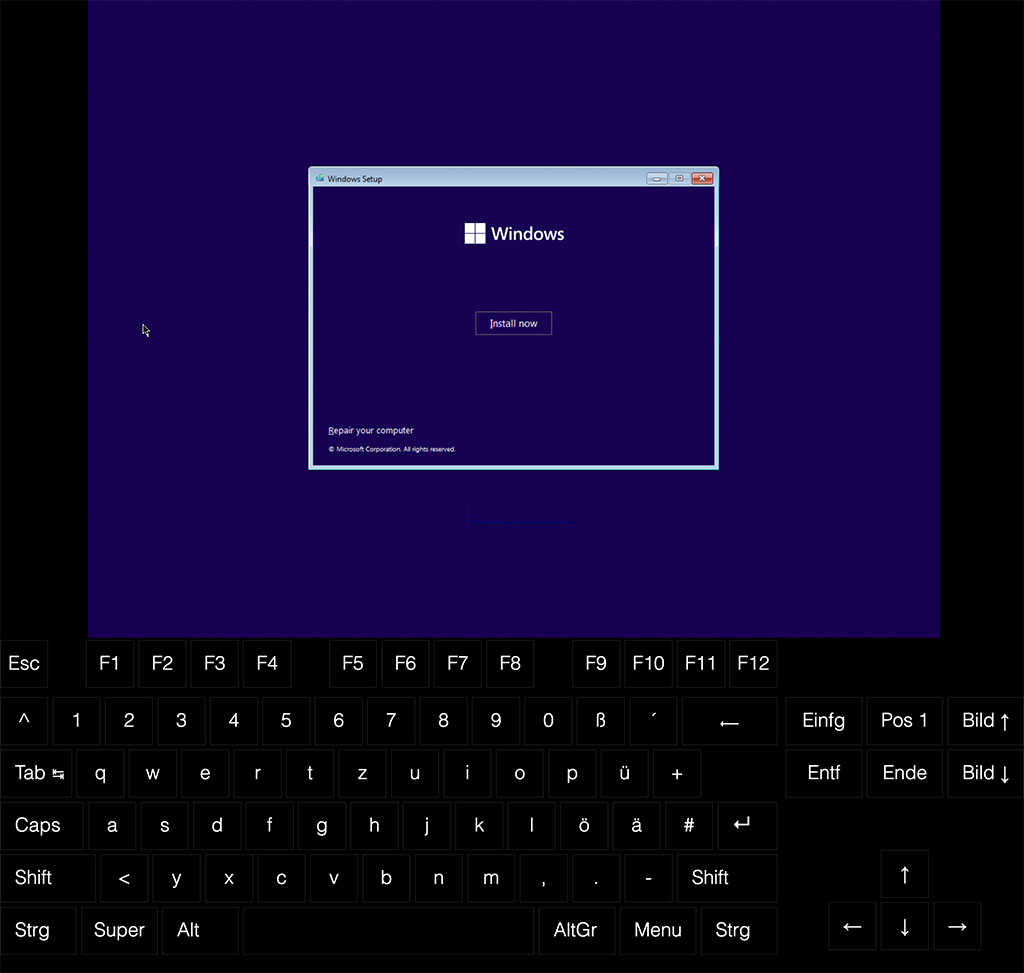
This will open the Windows Command Prompt.
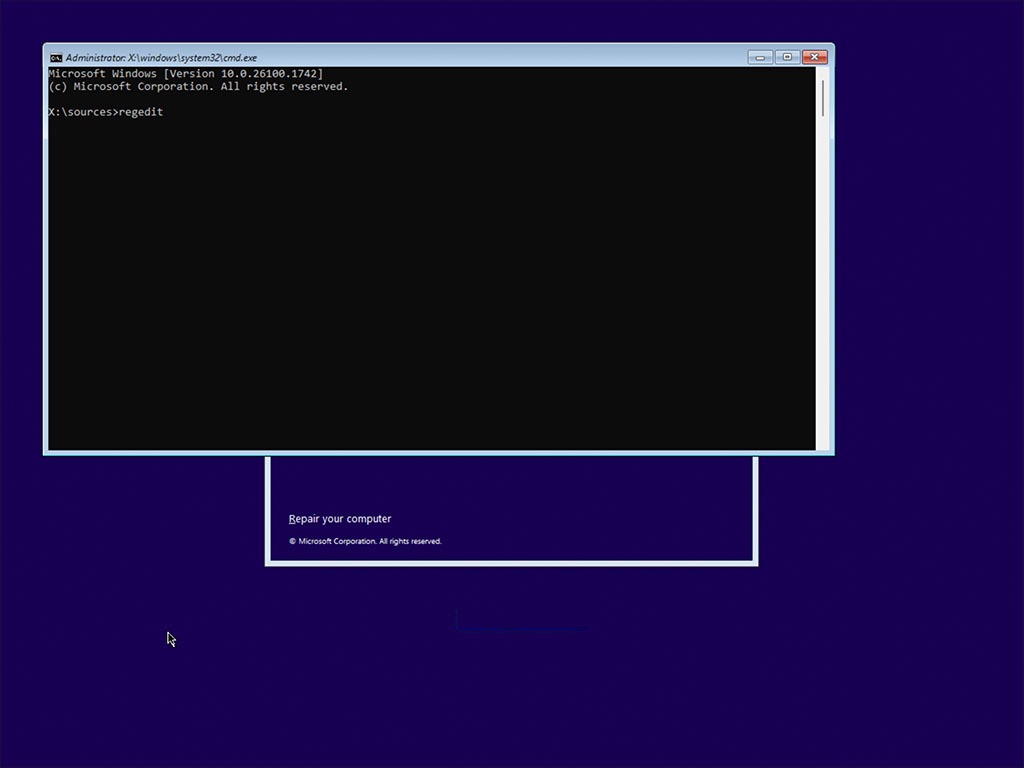
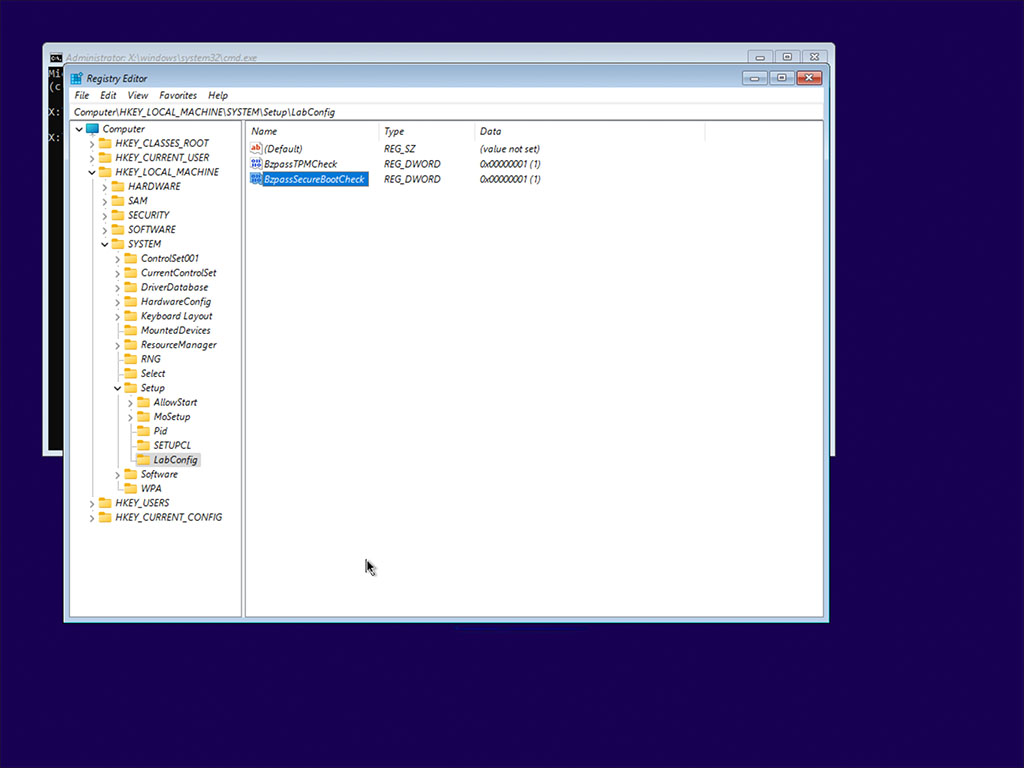
Type regedit into the Command Prompt and press Enter – this will open the Registry Editor.
Navigate to Computer\HKEY_LOCAL_MACHINE\SYSTEM\Setup, right-click on Setup, select New → Key, and name the new key LabConfig.
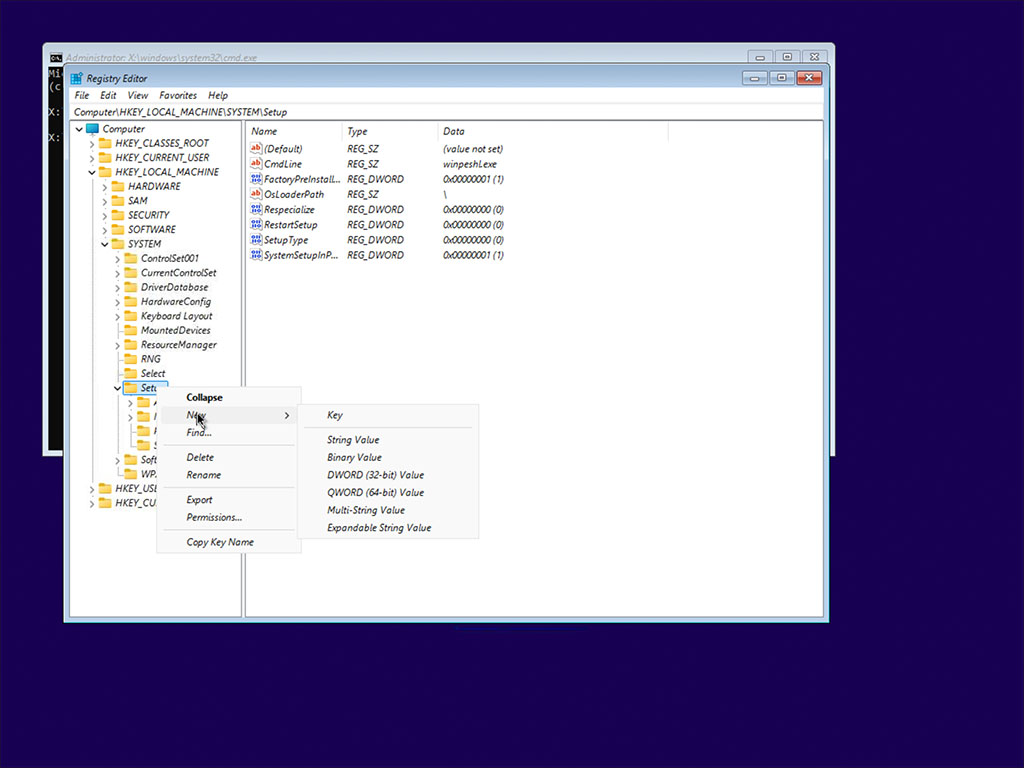
Then select the newly created LabConfig key and use right-click to create two new DWORD (32-bit) values:
– Name the first one BypassTPMCheck
– Name the second one BypassSecureBootCheck
Double-click both entries and set their value to 1.
The result should look like the image shown next.
Now close the Registry Editor and the Command Prompt, then click Install now.
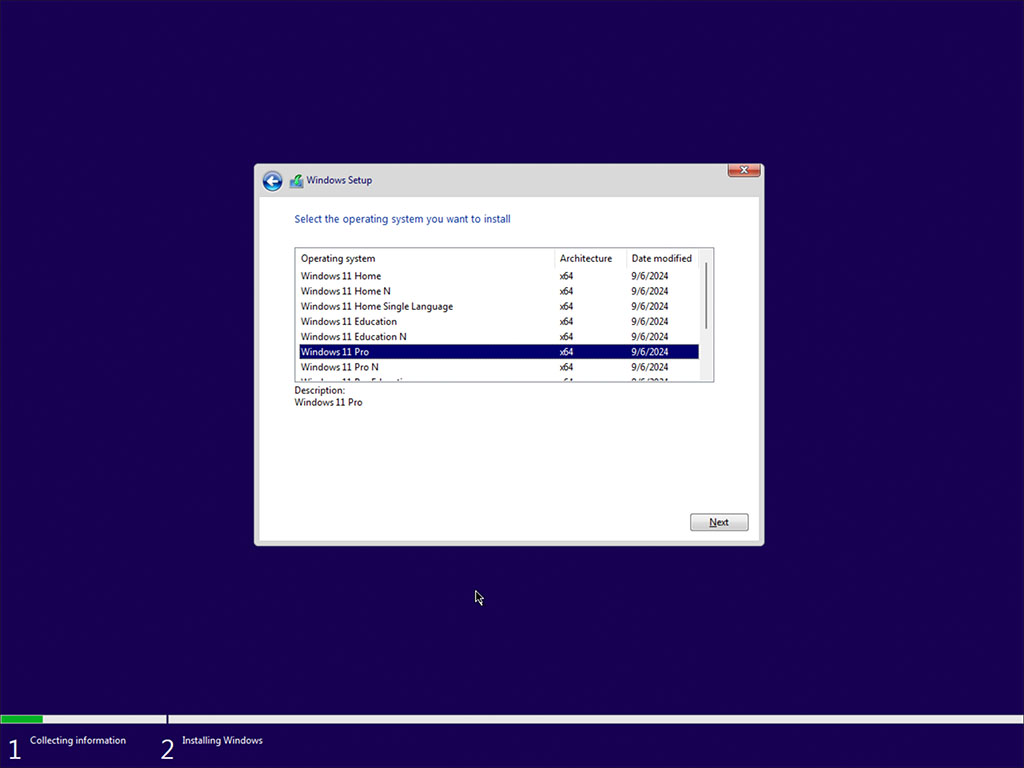
In the activation window, select I don’t have a product key. Then, in the next dialog, choose Windows 11 Pro and click Next.
Next, you need to accept the license terms to proceed.
In the following window, select Custom: Install Windows only (advanced).
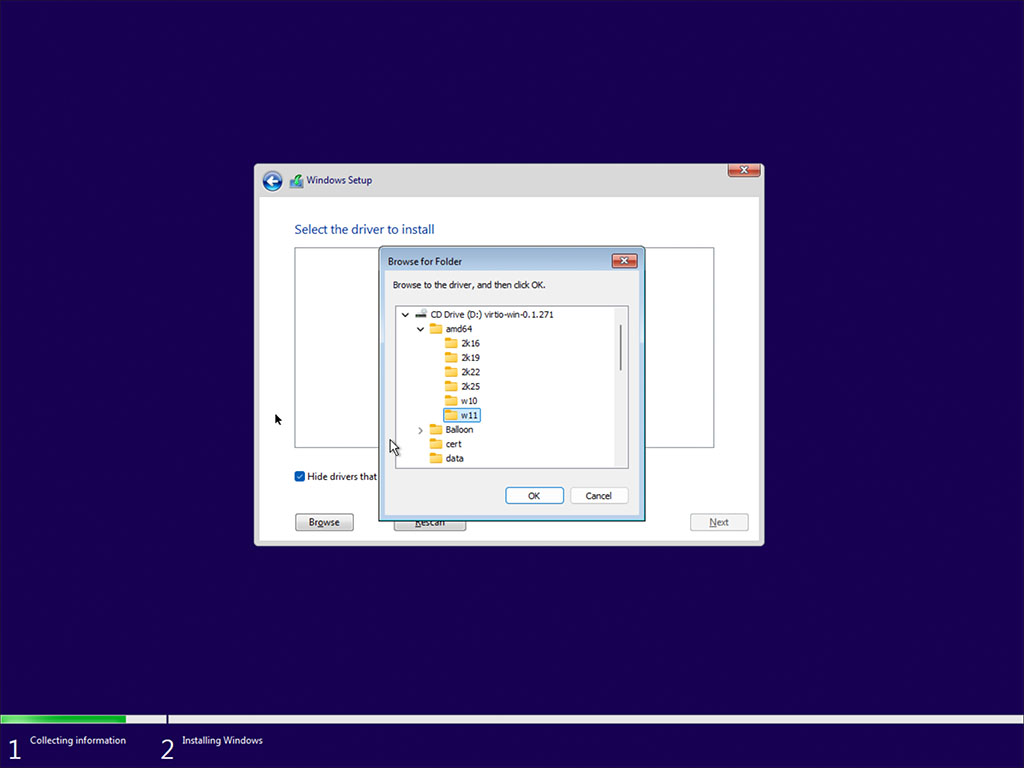
Since Windows does not recognize the disk without additional drivers, you now need to load the VirtIO drivers.
To do this, go to the Server Control Panel, navigate to Media→DVD Driver→Custom ISOs, and click Select next to your VirtIO ISO file. After clicking Save, the VirtIO driver CD will be mounted to the virtual drive.

After a short moment, the mounted driver DVD will be detected – now switch back to the VNC Console.
There, click on Load driver and navigate to the amd64\w11 directory to select the appropriate drivers.
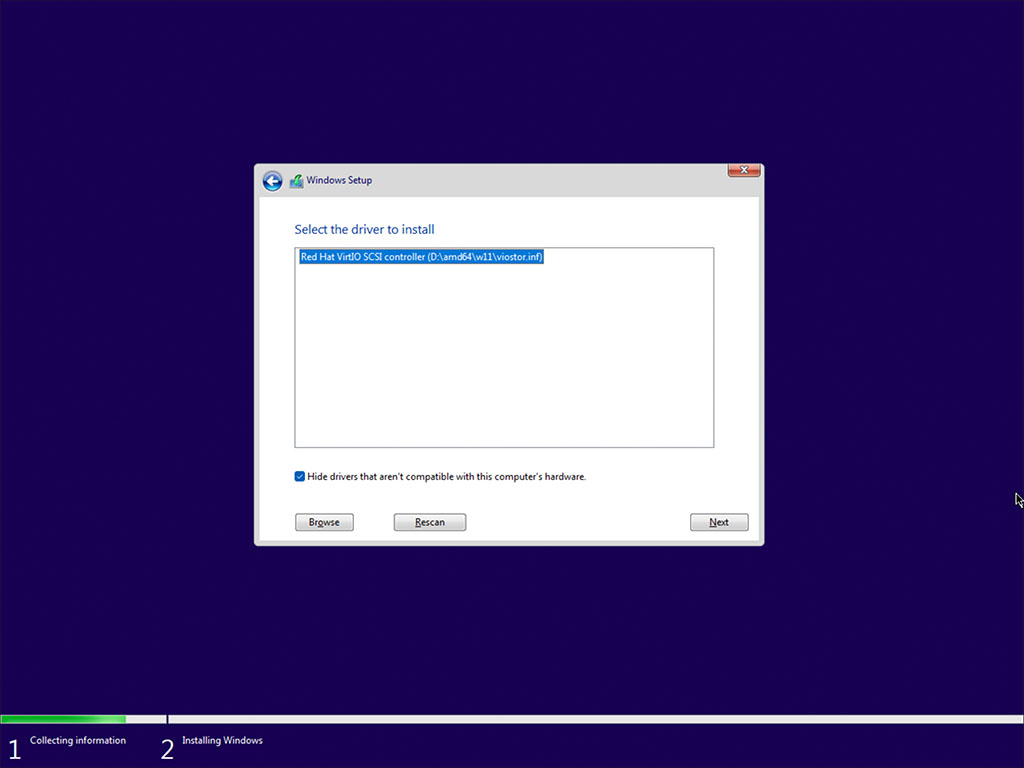
The Red Hat VirtIO SCSI driver will then be displayed. Select it and click Next to install it.
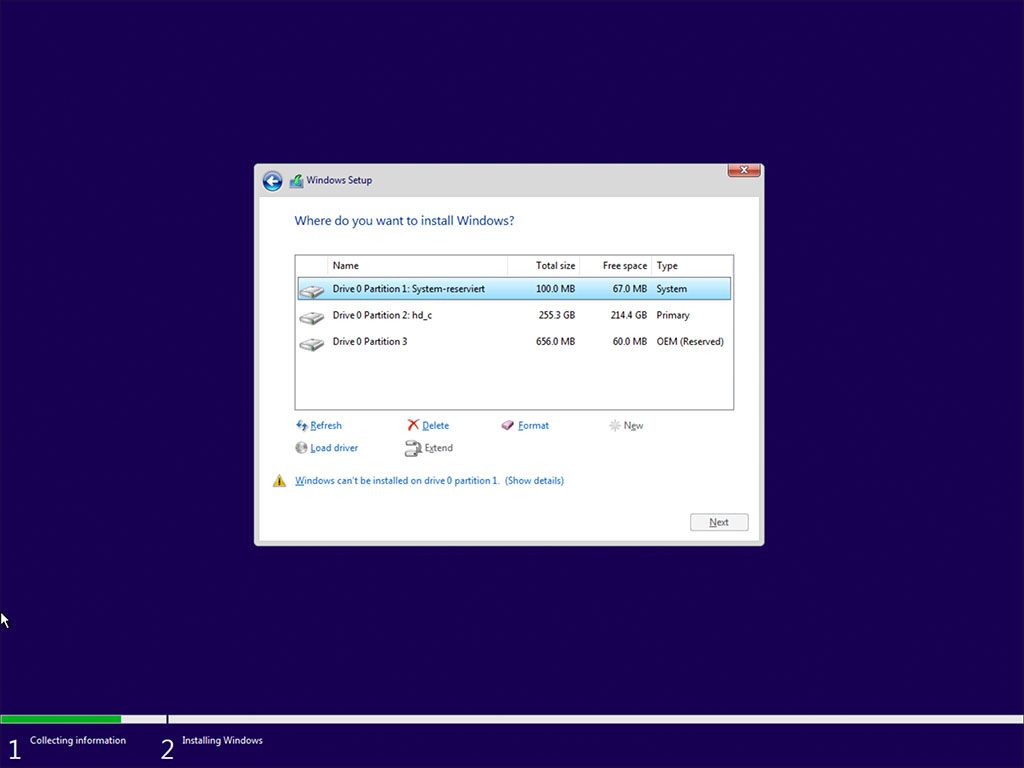
After the driver is loaded, the hard drive will be recognized and the existing partitions will be displayed.
Select each partition one by one and click “Delete” until only unallocated space remains.
If you still see the message Windows cannot be installed on this drive, it’s because the VirtIO driver CD is still mounted.
Therefore, switch back to the Server Control Panel and reselect the Windows installation DVD.
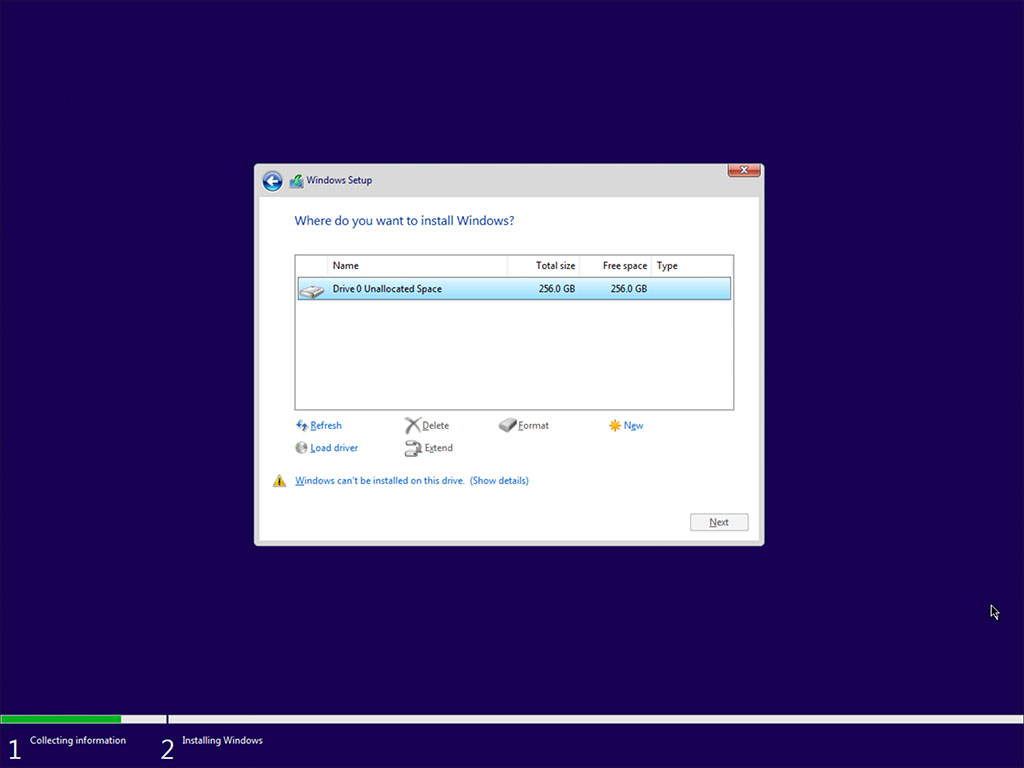
Once you’ve confirmed your selection in the Control Panel by clicking Save, return to the installation and click Refresh.
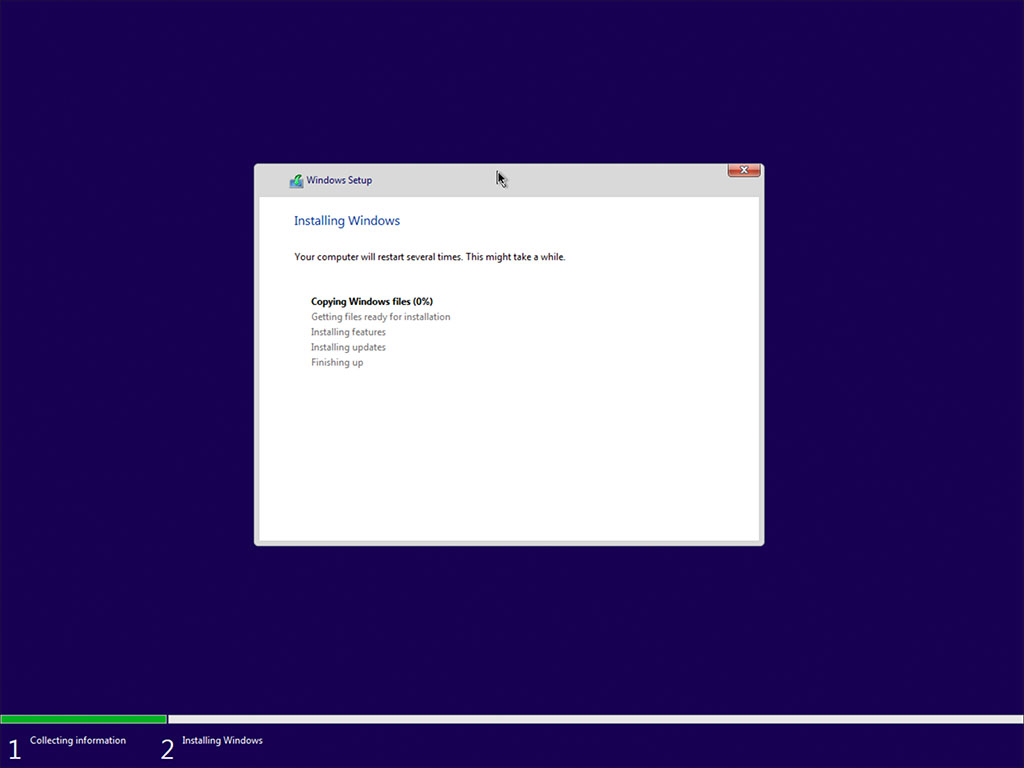
You can now click Next to start the Windows installation – a progress bar will appear showing the installation status.
After several automatic restarts, the Windows setup continues. First, you select your country and the desired keyboard layout – this part is self-explanatory.
However, since Windows doesn’t have network drivers yet, you’ll need to use a small trick:
Bring up the on-screen keyboard and press Shift + F10 again to open the Command Prompt. Enter the command oobe\bypassnro and press Enter.
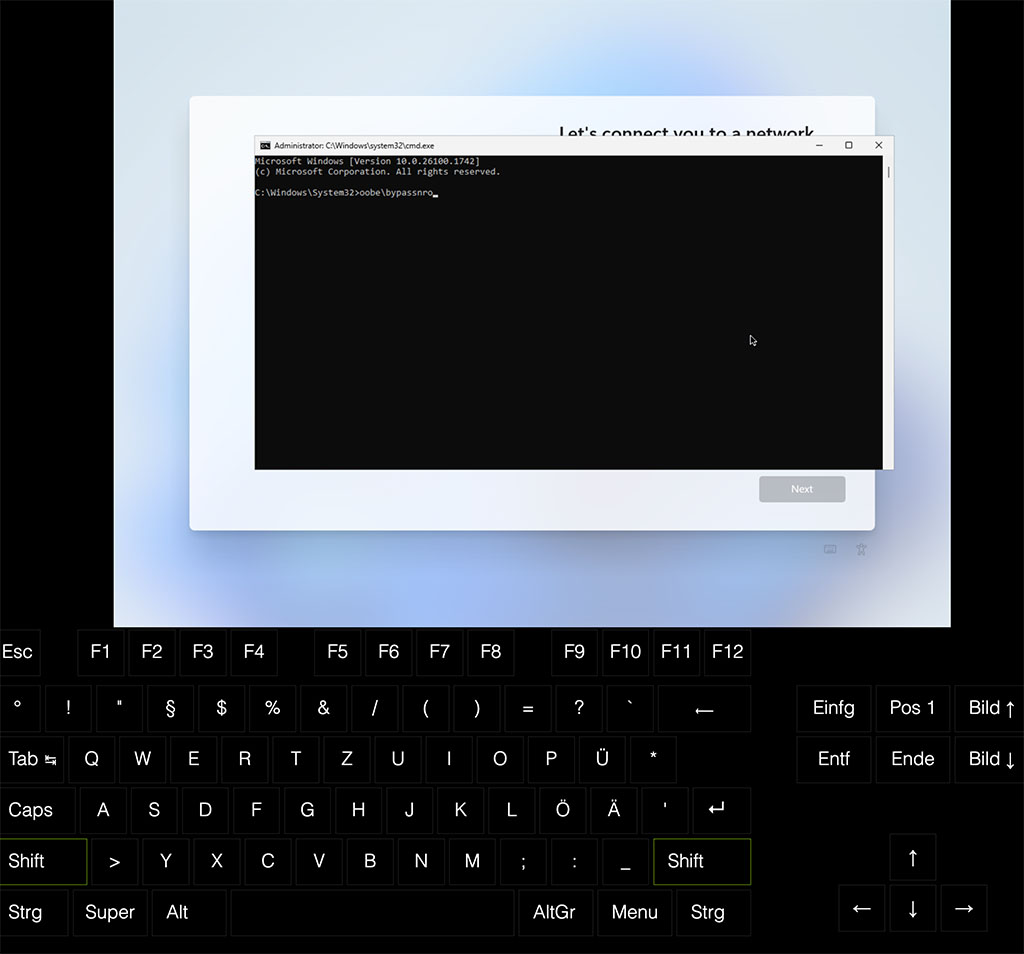
Windows will restart. After re-entering your country and keyboard layout, you will now see the option I don’t have internet.
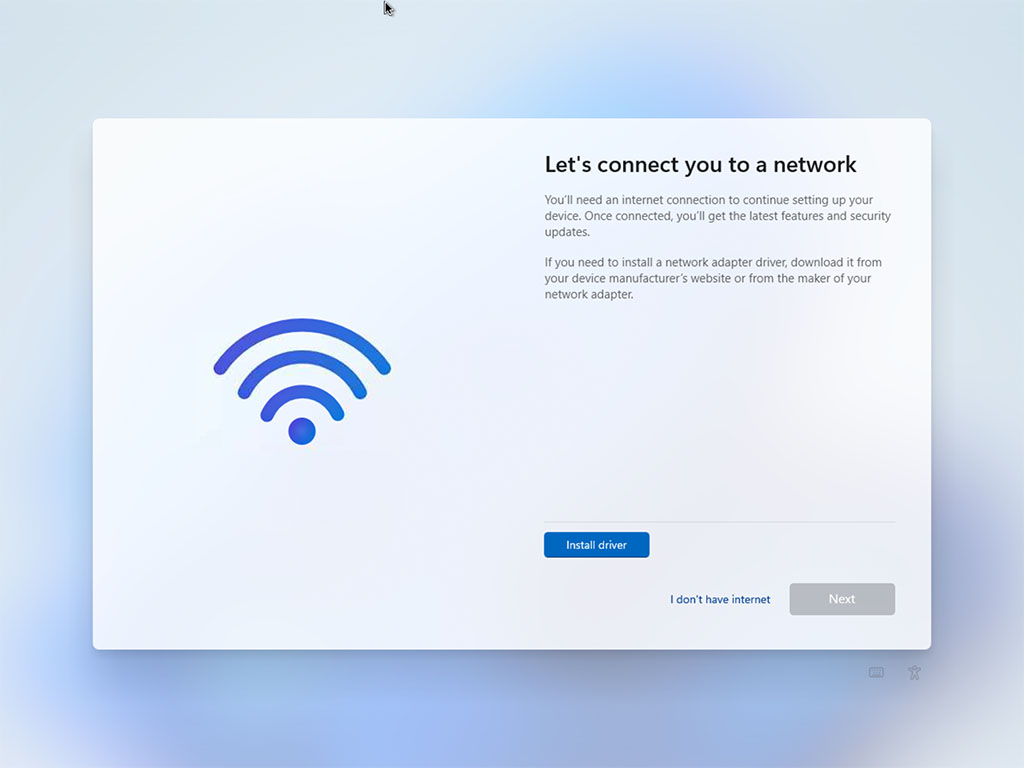
Now select I don’t have internet and then enter your desired username and a secure password – ideally something sufficiently complex, since the server will be online continuously.
After setting the password, you’ll be asked to define three security questions.
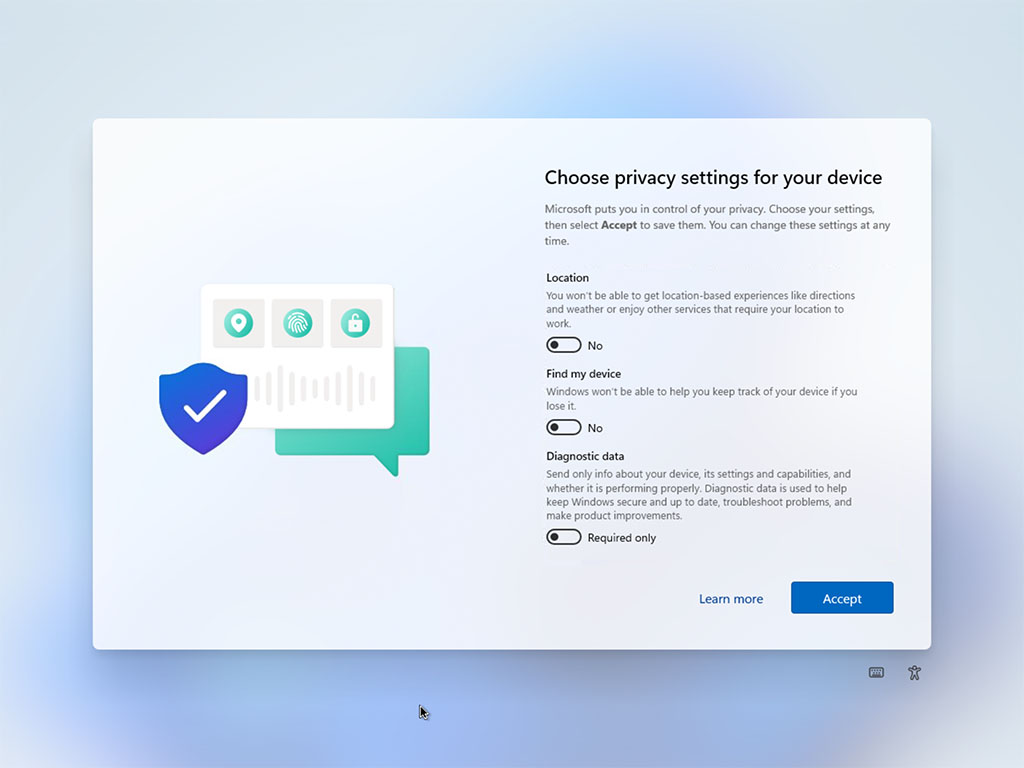
In the following steps, you’ll configure the Windows privacy settings – I generally recommend choosing No or the options with the least data sharing.
After a short moment, the installation is complete and Windows will start.
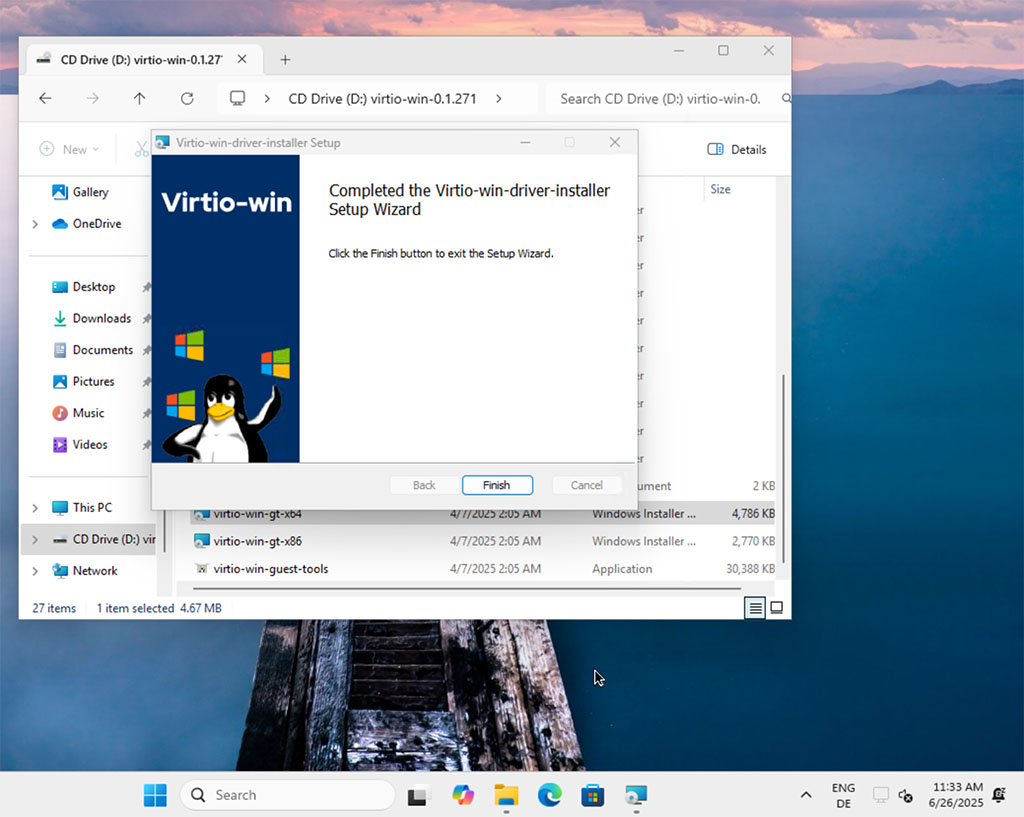
Now you still need to install the Windows drivers: To do this, go to the Server Control Panel and mount the VirtIO driver CD again.
Then open the root directory of the VirtIO CD in Windows and run the file virtio-win-gt-x64 – this will launch the VirtIO Setup Wizard.
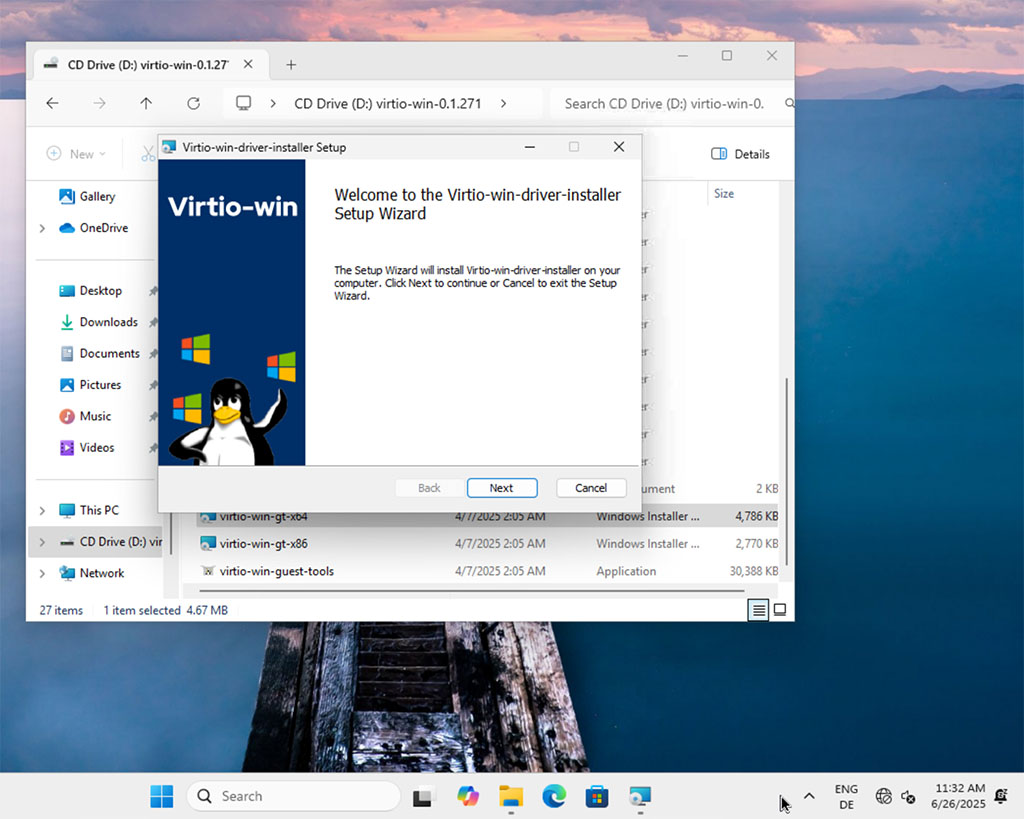
Confirm all prompts from the installer and leave the suggested component selection unchanged.
Once the installation starts, the VirtIO Windows drivers will be installed automatically.
This means the basic configuration of Windows is almost complete.
If you open Server Control Panel→Control, you’ll see an info message saying that the qemu-guest-agent is not installed. We want to get rid of this message.
The VirtIO ISO should still be mounted. In Windows Explorer, open the guest-agent folder on the CD drive and run the file qemu-ga-x86_64. Confirm all prompts to complete the installation.
Afterward, it’s recommended to restart the server: In the Control Panel, go to Control → Powercycle.
After the reboot and Control Panel update, the warning message should be gone.
You can now unmount the VirtIO ISO: In the Server Control Panel, go to Media → DVD Drive → Detach DVD to remove the virtual drive.
What’s next?
You’ll install the Tailscale client and enable RDP so you can securely access your Windows PC via Remote Desktop.
And after that, you’ll configure the Windows Firewall.
Leave a Reply
You must be logged in to post a comment.