Part 4 of the Series: Windows 11 on Your Root Server: RDP, Tailscale & VPN for a Free Internet
Download the Tailscale client for Windows from tailscale.com/download and install it on your Windows server.
Then sign up for Tailscale – it’s quick and easy at login.tailscale.com/start.
Don’t forget: you also need to install the Tailscale client on your local computer in order to connect to the server later.

After downloading, install the Tailscale client on your Windows PC.
Once installation is complete, a browser window will open automatically where you sign in to Tailscale and authorize access.
The PC is now registered with your Tailnet and reachable.
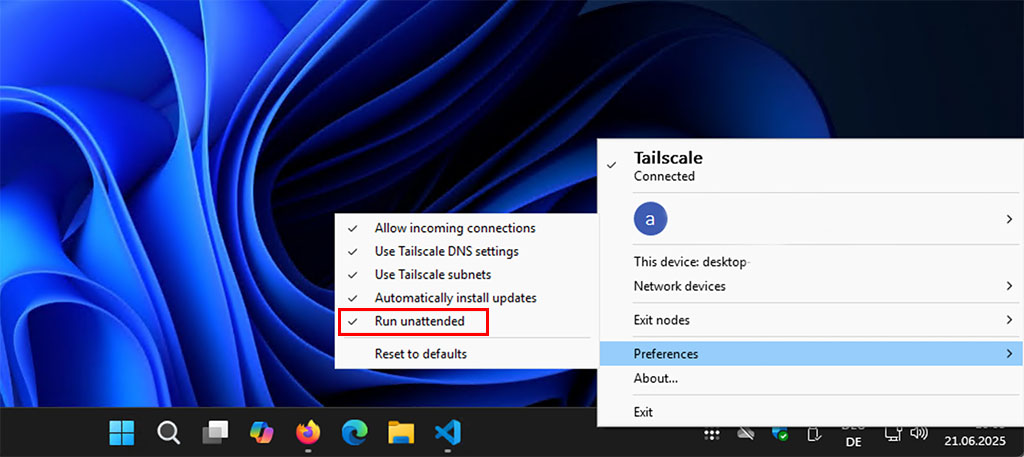
To ensure your Windows PC automatically reconnects to the Tailnet after a reboot, you need to enable unattended mode:
Right-click the Tailscale icon in the taskbar (bottom right) and select “Preferences”. Then check the box for Run unattended and confirm the following prompt.
This ensures a persistent connection to Tailscale even after reboots.
Now enable RDP (Remote Desktop): In Windows, go to Start → Settings → System → Remote Desktop and switch the Remote Desktop option to On.
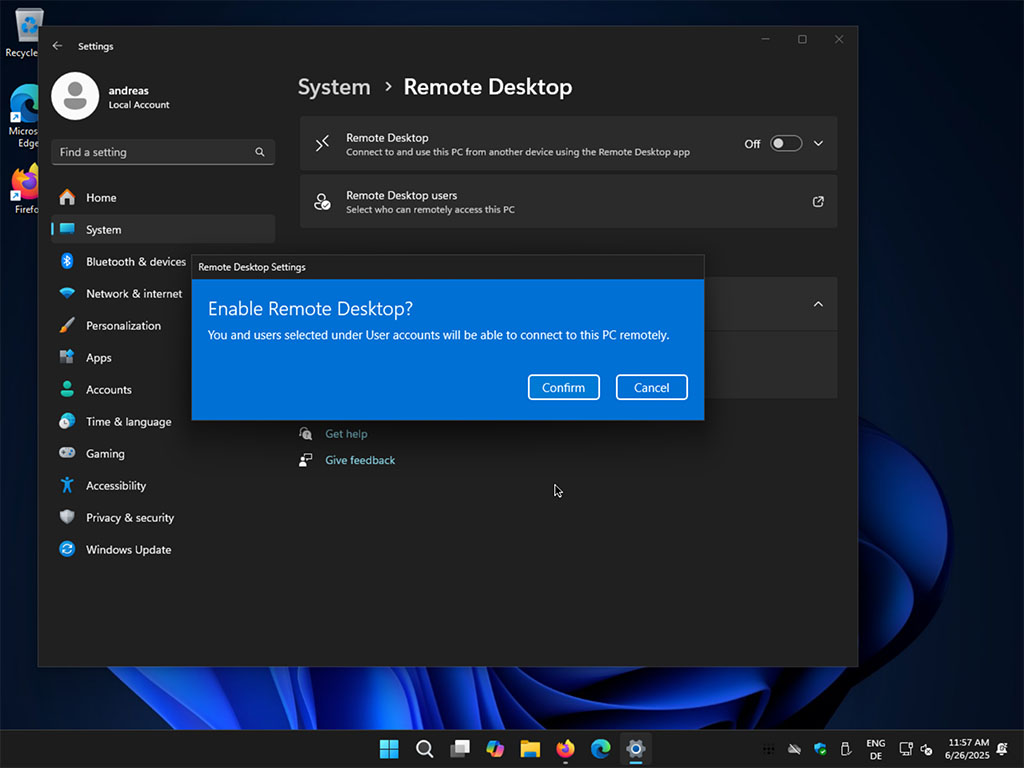
After you’ve enabled Remote Desktop, a confirmation prompt will appear – you need to confirm it by clicking Yes. RDP is now active.
WARNING: Proceed to the next step immediately!
In the next step, you will configure the Windows Firewall and disable unnecessary services that are not needed on a remote Windows PC.
This is a critical security measure, because in its current state, your system is still directly exposed to the internet.
Leave a Reply
You must be logged in to post a comment.